Monday, October 31, 2011

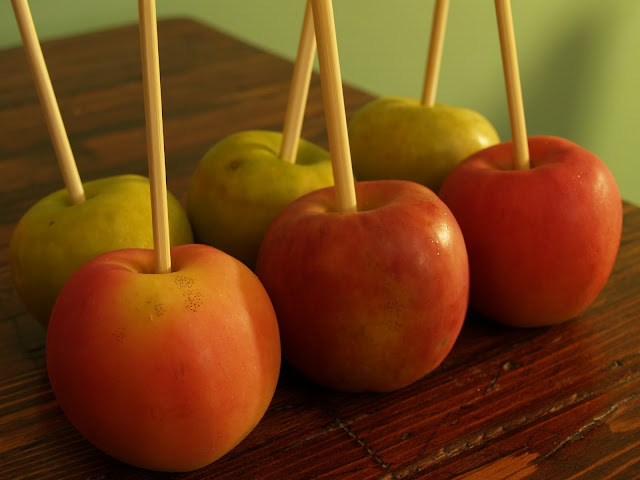
Caramel Apples


One Halloween, while trick-or-treating with friends, I found myself at the doorstep of one of those "questionable" houses, meaning it was unclear if anyone was home or not. The front porch light was on, but the path to the door was dark and there were no decorations or pumpkins to be found. My friends and I rang the bell, and were surprised when a little old lady wearing a babushka came to the door. She didn't say much, just presented us each with homemade caramel apples wrapped neatly in plastic and tied with a bow. She wished us on our merry way, but as we left her house we stopped and froze. Though these were probably the tastiest caramel apples on the planet, we quickly convinced ourselves the old woman must be a witch! We spun tales of her sliding razor blades into the seemingly innocent apples, or dipping them into a poisonous brew. So, fighting every possible urge to eat them, we felt it our duty to toss the apples in the trash and carry on in pursuit of more brand-named, mass-produced candy.


To this day, I'm still convinced that those must have been the most incredible caramel apples ever. I can see her in her kitchen now, using her grandmother's caramel recipe and apples off her own tree. What a shame to have thrown them away! Of course, it's important to be cautious when it comes to kids and homemade candy given out by strangers, but how many little old ladies do you know who keep poison and razor blades in their pantry? Witch or no witch, I've made these caramel apples to pay homage to that babushka-wearing old lady and her fallen caramel apples. Hopefully this recipe comes close. Happy Halloween!


CARAMEL APPLES:
Caramel recipe adapted from Ina Garten, Food Network Magazine 

Ingredients:
Vegetable oil
1½ cups sugar
¼ cup light corn syrup
1 cup heavy cream
5 tbsp. unsalted butter
1 tsp. sea salt
½ tsp. vanilla extract
8 crisp, tart apples (such as Granny Smith or Braeburn), stems removed 
1 cup salted peanuts (or other nut of your choosing), chopped
1 cup multicolored sprinkles (or other garnish of your choosing) 
8 wooden skewers or chopsticks (the to-go kind) 

Begin by bringing a medium-sized pot of water to a boil. Add the apples two at a time and boil for 10 to 20 seconds. Remove with a spider or slotted spoon and wipe clean with a paper towel or clean cloth to remove any wax or dirt. Place in an ice bath to cool. Wipe dry, insert wooden skewers or chopsticks into the stem-end of the apples, and place in the refrigerator to keep cold. Repeat with remaining apples (this step can be done a day in advance). 

Line a sheet pan with parchment paper, lightly brush with vegetable oil and place in the refrigerator. Place your chopped nuts, or other toppings, on plates and set aside.  

In a deep sauce pan (about 6 inches wide and 4½ inches deep), combine ¼ cup water, the sugar and corn syrup and bring them to a boil over medium-high heat. Boil until the mixture is a warm golden brown, about 15 minutes. Do not stir the sugar mixture- just swirl the pan if need be.

Meanwhile, in a small pot, bring the cream, butter, and salt to a simmer over medium heat. Turn off heat and set aside.

When the sugar mixture has reached the desired color, turn off the heat and slowly add the cream mixture to the sugar mixture. Be careful, as this will bubble up violently. Stir in the vanilla using a wooden spoon and place a candy thermometer in the caramel. Cook over medium-low heat for about 10 minutes, until the mixture reaches 248 degrees F (firm ball) then immediately remove from heat. 

Let the bubbling subside and begin twirling your apples in the caramel (you may need to tilt the pot to fully coat the apples). Allow the excess caramel to drip off before dipping in the desired toppings (chopped nuts, sprinkles etc.) and immediately transferring to the prepared pan in the refrigerator to set. Repeat with the remaining apples. Store in the refrigerator until ready to serve.

Yield: 8 caramel apples

Notes:
  • Do not substitute waxed paper for parchment, as the caramel will melt the wax and stick to the paper.
  • Most apples are coated in a food grade wax, so you'll want to boil them prior to dipping in the caramel, otherwise the caramel might not stick to the apples. Also, the caramel will better adhere to the apples if you keep them cold in the refrigerator until ready to be dipped. 


    Saturday, October 29, 2011

    Creepy Witches' Fingers


    This is a Halloween inspired take on the traditional Lady Fingers. They're so creepy to look at, not to mention fun and delicious to eat. I first saw these in Martha Stewart Living, and thought they were so clever, I had to try them! I've changed the coloring of the "finger nails" to green because they seemed more witchy. I also added a few warts here and there, because every good witch has plenty of warts.


    These are a nice cookie to throw in the mix because they're not too sweet or filling. Let's face it, Halloween is all about the cookies, cakes, and candy, but with so many other sugary treats on the table, I wanted to give everyone's taste buds a break. I tried these out today with a cup of coffee, and as you might expect, they're finger lickin' good!


    WITCHES' FINGERS:
    Adapted from Martha Stewart Living

    Ingredients:
    1 tbsp. green liquid food coloring
    30 blanched almonds (see notes below)
    2 large eggs
    ¼ tsp. vanilla extract
    8 tbsp. unsalted butter
    ½ cup confectioners' sugar
    5 tbsp. granulated sugar (see notes below)
    Pinch of salt
    1- 2/3 cups all-purpose flour

    Preheat oven to 350 degrees. Line two baking sheets with parchment paper, and set aside. Place food coloring in a small shallow bowl. Using a small paintbrush, color one rounded half of each almond. Set aside to dry. Separate 1 egg and set aside the white. In a small bowl, whisk together yolk, remaining egg, and vanilla and set aside.

    In the bowl of an electric mixer fitted with the paddle attachment, combine butter, confectioners' sugar, granulated sugar, and salt. Beat on medium speed until well combined. Add egg mixture, and beat until smooth, about 2 minutes. Add the flour, and mix on low speed just until incorporated. Wrap the dough in plastic, and chill until firm, 20 to 30 minutes.

    Divide the dough in half. Work with one piece at a time, keeping remaining dough covered with plastic wrap and chilled. Divide the first half into 15 pieces. On a lightly floured surface, roll each piece of dough back and forth using your palms to create the "fingers," about 3 to 4 inches long. Pinch dough in two places to form knuckles. Score each knuckle lightly with the back of a small knife. Transfer fingers to prepared baking sheets and place in the refrigerator to firm up for 15 to 20 minutes. Repeat with remaining dough.

    When all the fingers are formed and cooled, brush lightly with beaten egg white. Position almond nails; push into dough to attach. Bake until lightly browned, about 12 minutes. Cool completely.

    Yield: 30 cookies

    Notes:

    • To blanch almonds, first place them in a small bowl. Bring a small pot of water to a boil, remove from heat, and pour over almonds. Let soak for 1 minute, then drain and rinse with cold water. The almond skins should peel off easily. Let dry on paper towels before using. 
    • As an alternative to painting each almond, soak the blanched almonds in food coloring for a few minutes, then remove to dry.
    • If you decrease the granulated sugar to 2 or 3 tbsp., the fingers will hold their shape better, but be slightly less sweet.

    Wednesday, October 26, 2011

    Homemade Candy Corn


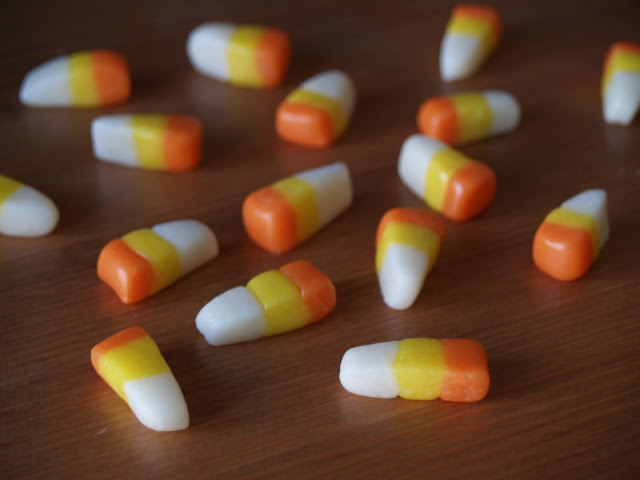
    When most kids receive candy corn in their trick-or-treat bag, they feel instant disappointment, and it's some of the first candy to get traded (I always ate candy corn, but I think I was more turned on by the colors than the taste). However, had I tried homemade candy corn as a kid, it might have been the crowning glory of the whole bag! The homemade goodness of this traditional Halloween treat is infinitely better than that store-bought stuff (if you think they taste like wax, that's because they're made with it). Of course, making your own takes a lot more time, but you get to play with the dough like playdough while you make it, and who doesn't like that? 


    As cute as these little buggers are, they didn't come without trouble! The candy corn you see pictured here was my third attempt. At times, candy making can be deceivingly simple. I'm a big fan of Alton Brown and his recipes have a good reputation for being fool-proof, so I was at a loss when they didn't turn out. The first time I made these I was using an altered recipe of Alton's with the incorrect ratio of  water to sugar. The second time, I used the correct measurements, but I overlooked one important direction in the recipe... to use a 2 quart pot! Since the circumference of the pot I used was too big, the heat was not concentrated, so it took too long for the candy to reach 230 degrees. After the second attempt, I almost threw in the towel, but luckily I didn't give up! Every time you cook you learn something new. This lesson was simple: READ! Was it worth all the trouble you ask? After eating my candy corn, I'd have to say yes, indeed.


    HOMEMADE CANDY CORN:
    Courtesy: Alton Brown 

    Ingredients:
    4½ oz. confectioner’s sugar, approximately 1¼ cups
    ½ oz. nonfat dry milk, approximately 6½ tsp.
    ¼ tsp. kosher salt
    3½ oz. granulated sugar, approximately ½ cup
    3¾ oz. light corn syrup, approximately 1/3 cup
    2½ tbsp. water
    2 tbsp. unsalted butter, room temperature
    ½ tsp. vanilla extract
    3 to 4 drops yellow and orange gel paste food coloring (or to make the orange, use 2 drops red and 3 drops yellow food coloring)

    Combine the powdered sugar, dry milk and salt in the bowl of a food processor. Pulse 4 to 5 times until the mixture is smooth and well combined. Set aside.
    Combine the sugar, corn syrup and water in a 2-quart pot. Put over medium heat, cover and cook for 4 minutes. Add the butter, clip on a candy thermometer, and bring the mixture to 230 degrees F, about 1 to 2 minutes (if it takes much longer than this, either your heat is too low or your pot is too big). When the sugar syrup reaches 230 degrees F, take the pot off the heat and remove the thermometer. Add the vanilla and the dry mixture, stirring continuously with a silicone spatula until well combined. Pour onto a half sheet pan lined with a silicone baking mat. Cool until the mixture is cool enough to handle, about 10 to 15 minutes.
    Divide the dough into 3 equal pieces. Add 3 drops of yellow food coloring to one piece and knead the dough until the color is consistent throughout. Add 3 drops of orange to the second piece, and knead until the color is consistent throughout. If the dough seems too stiff and difficult to knead, place it in the microwave for 5 to 10 seconds to soften. Leave the third piece white. Roll each piece of dough into a strand, about 18-inches long. Cut each strand in half.
    Roll one of the white pieces into a strand that is about 1/2-inch thick and about 22-inches long. Repeat with the yellow and orange pieces. Lay the strands side by side and press them together using your fingers (the order should be: white, yellow, and orange). Cut the strand into 4-inch pieces. Lay the strands, one at a time, onto the silicone mat and press into a wedge shape (I use the straightedge of a ruler to accomplish this), like a triangle. Use a knife, metal bench scraper or pizza cutter to slice the dough into small pieces. Repeat the procedure with the remaining dough. Lay the finished pieces on a sheet of parchment or waxed paper to dry for 1 hour. Store in an airtight container with parchment paper between each layer. The candy corn can be made up to a week in advance.


    Yield: 80 to 100 pieces 


    Notes:
    • As for all candy making, try to use a kitchen scale for exact measurements.  
    • Be sure to use a 2-quart pot when making these candies.
    • You can find gel food coloring at most baking supply stores or online.

    Monday, October 24, 2011

    Death Rattle


    For the last several years Aaron and I have been hosting a Day of the Dead dinner for our friends and family. Once a year we take a moment to laugh and reminisce about loved ones who’ve passed on. Over time, the guests at the dinner table have continued to grow. It’s a merry occasion, not a somber one, and a chance for all of us to learn about those no longer with us, and how they’ve shaped our lives.  


     At themed dinners, or dinners for a holiday or special occasion, I often like to provide party favors for our guests. Last year, on Dia De Los Muertos, I made these “death rattles” as place markers and gifts. They’re festive, fun, and add a touch of whimsy to the table (kids will love them!). Your guests will have something to take away from the dinner (besides their full bellies) as a keepsake and a memory of the occasion itself. You can continue to use these as Halloween or Day of the Dead décor for years to come!


    Here’s how I made ‘em:
    • Pick up some small paper mache globe ornaments from the craft store and remove the string. 
    • Drill a hole using a 3/16” drill bit, where the string had been, big enough (but not too big!) to snuggly fit a wooden dowel into the paper mache globe.
    • Use a small hacksaw to cut the dowel to the appropriate length (about 8 inches).
    • Paint the globes with two coats of off-white paint. 
    • Draw a face on the globes using a fine tip permanent marker. 
    • Take about ¼ teaspoon of dried rice and put it inside the globe, through the drilled hole to create the “rattle” noise.
    • Insert the dowel into the hole- it should fit tight enough so that you don’t have to use glue (the rice would stick to the glue). If need be, place a little hot-glue where the head meets the dowel.
    • To make the top hats, use stiff black felt and cut two circles, one for the top of the hat and one slightly larger for the brim (or buy small top hats at the craft store if you can find them). 
    • Cut a long rectangle piece of felt long enough to fit the circumference of the top circle. 
    • Assemble the hat using hot glue. 
    • Glue a small feather to the side of the hat. 
    • Use black ribbon to create a sash around the brim. 
    • Attach the hat to the side of the skull using hot glue. 
    • Use the same black ribbon to tie around the dowel to make the “bow tie.” 
    And there you have it- a death rattle to charm your Halloween or Day of the Dead inspired table!  

    Friday, October 21, 2011

    Carrot Ginger Soup


    On a whim, I made this carrot soup the other night for dinner, mainly because I had a bunch of carrots I wanted to use up and a little knob of ginger lying around. The two looked so lonely apart, but together they turned out to make a rich and creamy soup. I hadn't had carrot soup in ages, so I figured it was high time I made it (and it was raining, which makes me want to hunker down and cook something cozy)! 


    Yes, I know what you're thinking, carrots are so boring... they're just carrots after all! But I promise you, this soup has flavor. It's slightly sweet with a hint of ginger and just a touch of heat. This is a great soup to make for a crowd or for your entire family, as it's both economical and delicious. What's more, you get your fill of veggies and fruit all in the same bowl! The apples provide a wonderfully light base to the soup, while the ginger and cayenne give it some pizazz. A warm and comforting end to a wet and rainy day.


    CARROT GINGER SOUP:

    Ingredients:
    2 tbsp. olive oil
    1 tbsp. fresh ginger, peeled and finely grated
    2 cloves garlic, minced
    1 medium yellow onion, roughly chopped
    1 quart (4 cups) chicken or vegetable stock (plus a little extra for thinning later on)
    4 large carrots (about 1½ lb.), peeled and cut into 1 inch pieces
    2 medium Granny Smith apples, peeled, cored, and cut into 1 inch pieces
    ¾ cup half and half or light cream
    1 tbsp. sugar
    Heavy pinch cayenne pepper (or to taste)
    Salt and pepper to taste
    Italian parsley, for garnish

    In a medium sized soup pot, over medium heat, sauté the ginger, garlic, and onions in the olive oil until onions are translucent, about 5 minutes. Add stock, carrots, and apples, cover pot and bring to a boil. Reduce heat to a simmer and cook for 30 minutes more or until carrots and apples are very soft.

    Remove from heat, and using a immersion blender, purée the soup until smooth (or transfer, in batches, to a food processor or blender and purée). Stir in half and half or cream, sugar, and cayenne. Season well with salt and pepper and taste to adjust seasonings. If the soup is too thick, add more stock to reach the desired consistency. Return to a simmer and serve hot with a sprinkling of Italian parsley.

    Yield: 1½ quarts, about 6 servings

    Notes:
    • Feel free to substitute the half and half or cream with coconut milk to make this soup vegan friendly.
    • I find this soup tastes even better after being refrigerated overnight, so if time allows, make a day in advance and reheat.

      Thursday, October 20, 2011

      Pumpkin Pancakes


      I've been making these pumpkin pancakes for a number of years. They're the perfect autumn breakfast treat. Admittedly, they're more of a dessert than a morning meal, but they're so scrumptious, you won't be able to resist! Nothing could be more perfect than a fusion of pumpkin pie and pancakes.


      Aaron just returned from performing in North Adams, MA and stopped by the Ioka Valley Farm on his way home. When he returned, he surprised me with some delectable pure maple syrup. What a delight! I thought we'd test out the syrup on our long awaited fall favorite, pumpkin pancakes. To top it off, I've added my homemade cinnamon whipped cream.


      PUMPKIN PANCAKES:
      Adapted from the October, 2006 issue of Martha Stewart Living

      Ingredients:
      1¼ cups all-purpose flour
      2 tbsp. sugar
      2 tsp. baking powder
      ½ tsp. ground cinnamon
      ½ tsp. ground ginger
      ½ tsp. salt
      1/8 tsp. ground nutmeg (fresh if you have it)
      Pinch of ground cloves
      1 cup whole milk
      ½ tsp. vanilla extract
      ¼ cup plus 2 tbsp. fresh or canned pumpkin puree
      2 tbsp. melted butter
      1 egg, lightly beaten

      In a large bowl, combine the flour, sugar, baking powder, spices and salt. In a separate medium sized bowl, add the milk, vanilla, pumpkin puree, melted butter, and egg. Whisk to combine. Using a spatula, fold the wet ingredients into the dry. Over medium heat, melt a small pat of butter on a large metal skillet. Ladle batter into skillet and cook pancakes for about 2-3 minutes on each side. Serve with cinnamon whipped cream, chopped toasted pecans, and maple syrup.

      Yield: 8 to 10 pancakes

      CINNAMON WHIPPED CREAM:

      Ingredients:
      ½ pint heavy whipping cream
      2 tbsp. sugar, or sifted confectioner's sugar
      ¼ tsp. cinnamon
      A splash of vanilla extract

      Place a small mixing bowl and a whisk or whisk attachment in the freezer for 15 minutes (this will help your cream stay cold and whip up faster). Remove the bowl and whisk from the freezer and add the cream to the bowl. Using a handheld or stand mixer (or by hand if you want an arm workout) beat on high speed just until the cream begins to thicken. Add the cinnamon, sugar, and vanilla extract, and continue to beat just until soft peaks form (do not over beat or you'll be left with a lumpy butter-like texture). If you want to be extra fancy, you can place the whipped cream in a pastry bag and pipe it onto the pancakes.  

      Monday, October 17, 2011

      It's a Cauliflower of a different color!


      Look at that color- what fun! You can find these beautiful varieties of cauliflower at specialty grocery stores or sometimes at your local farmer's market. Whenever I see them, I try to snatch them up. They're fun to eat and a nice change from the traditional white cauliflower (tell your kids that aliens eat it, and maybe they'll be more inclined to try it).


      I used to think of cauliflower as a boring, bland vegetable, that could only be steamed and mixed with carrots and broccoli. Cafeteria food at best. But it doesn't have to be! I find roasting brings out its true flavor. It becomes buttery, brown, and melts in your mouth. One of my favorite ways to prepare it is with fennel and onions. It's a quick and delicious side dish that looks as good as it tastes. Of course, you can find cauliflower at the supermarket year round, but save it for when it peaks in the fall and winter months.


      ROASTED CAULIFLOWER:

      Ingredients:
      1 head cauliflower, cut into florets
      1 medium yellow onion, cut into 1/2 inch slices
      2 medium fennel bulbs, fronds removed, cut into 1/2 inch slices
      4 cloves garlic, well smashed
      4 tbsp. olive oil
      Salt and pepper to taste

      Preheat oven to 425 degrees. Combine cauliflower, onion, fennel, and garlic in a medium sized bowl. Drizzle with olive oil and season generously with salt and pepper. Toss well, seeing that everything is coated in oil. Evenly spread the ingredients on a parchment or foil lined sheet pan and bake for 30 to 35 minutes or until browned, but still crispy (toss ingredients halfway through cooking time to prevent sticking- you can add a little more oil if needed). Taste to adjust seasonings and serve warm.

      Note:
      • You can combine this recipe with pasta. Double the recipe (bake on 2 sheet pans) and toss with your cooked pasta, drizzle with olive oil, season with more salt and pepper, if necessary, and serve. It's great with crumbled sausage too!

      Saturday, October 15, 2011

      Skull Garland


      Here's another Halloween decorating idea for your home! This skull garland is easy to make and can be done for just a few dollars; I've been hanging it on our mantle for years.


      I initially made this haunting trimming for our annual Day of the Dead dinner. In many parts of Mexico, on Dia de los Meurtos, families create altars to honor the dead. They adorn these altars with food and objects that belonged to their deceased loved ones when they were alive. They also display small clay statues that resemble them. I've taken inspiration from this holiday and created mini skulls in the same style. Though I made the garland for Day of the Dead, I like to hang it up for the whole month of October, since it works perfectly for Halloween as well.


      Here's how to make them:

      • What you'll need: two to three packages of white baking clay, black craft paint, copper wire, black, orange, and yellow beads, and a tooth pick.
      • Mold your clay into a number of small skull shapes (making enough to fill your desired length of garland). You can look at pictures online for inspiration. These don't have to be perfect- each one will take on a slightly different shape.
      • Using a toothpick, horizontally pierce the clay skull through the center part of the head.
      • Bake clay according to label directions. Remove from oven and let cool.
      • Paint a face on each of the skulls.
      • String the copper wire with your multi-colored beads, alternating colors and creating a pattern of black, orange, and yellow. Do ten sets of this combination, string on a skull and repeat. Continue in this manner until all of your skulls are used and you've reached your desired length.

      Tuesday, October 11, 2011

      Ganache Covered Brownies


      This past week, Aaron and I were having intense cravings for something chocolaty and delicious. We didn't feel like cake or cookies, but we did feel like homemade brownies! As if that weren't enough, I've also been wanting to make chocolate ganache (ganache is just a fancy word for melted chocolate and cream). Then I thought, why not put the two together? They turned out to be a match made in heaven! These brownies have a wonderfully deep chocolate flavor, which was just what we needed to cure our cravings.


      The dilemma of making a dessert is not having enough mouths to eat it. Don't get me wrong, if left to my own devices, I'm sure I could polish off a cake or a mountain of cookies... in due time. But I find desserts to be the perfect excuse to get together with friends. With this in mind, I met up with said friends in Central Park, took a long walk (much to my dog Lady's delight) and had these scrumptious treats ready to welcome us home. Coffee, homemade brownies and good friends. It doesn't get much better than that.


      This brownie recipe is the creation of Nick Malgieri, from his book, Chocolate: From Simple Cookies to Extravagant Showstoppers. It was also featured in Saveur Magazine, Issue 113. I've changed it just slightly, and of course smothered it with ganache and toasted hazelnuts. You can use any brownie recipe you please (but this one's to die for), and simply add the ganache and nuts. It seems so many people have nut allergies that, to avoid a catastrophic allergic reaction, I don't bake the hazelnuts into the brownies. Instead, I sprinkle them on at the end. This allows me to leave a few nut free, so no one's left out, but you can certainly add the nuts to the batter if you please.


      BROWNIES:
      Adapted from a Nick Malgieri recipe

      Ingredients:
      2 sticks unsalted butter, cut into 16 tablespoons (plus more for greasing)
      8 oz. bittersweet or semi-sweet chocolate (I used a combination of both), finely chopped
      1 tbsp. instant coffee powder
      4 eggs
      1 cup sugar
      1 cup dark brown sugar, firmly packed
      2 tsp. vanilla extract
      ½ tsp. sea salt
      1 cup flour

      Preheat oven to 350 degrees. Grease a 9 x 13 inch baking pan with butter and line with parchment paper (allowing enough to hang over the sides to use later for ease in removing the brownies). Grease paper and set pan aside.

      Pour enough water into a 4-quart saucepan that it reaches a depth of 1 inch. Bring to a boil; reduce heat to low. Combine butter and chocolate in a medium bowl; set bowl over saucepan. Cook, stirring, until melted and smooth, about 5 minutes. Remove from heat and whisk in the coffee powder. Set aside to cool slightly.

      Whisk the eggs together in a large bowl. Add sugar, brown sugar, vanilla and salt; whisk to combine. Pour chocolate mixture into bowl through a fine mesh strainer and stir to incorporate. Fold in flour. Pour batter into prepared pan and spread evenly. Bake until a toothpick inserted into the center comes out clean, about 30-35 minutes (switching pan position halfway through cooking time, to ensure even baking). Let cool to room temperature on a rack. 

      Yield: 12 large brownies


      GANACHE FROSTING:

      Ingredients:
      12 oz. bittersweet or semi-sweet chocolate (I used a combination of both), finely chopped
      12 fl. oz. (1 ½ cups) heavy whipping cream
      ¼ cup hazelnuts, lightly toasted and chopped

      Place the chopped chocolate in a large stainless steel bowl. Pour the heavy cream in a small saucepan and bring just to a simmer, being careful not to boil. Remove from heat and pour over the chocolate. Let sit for 1 minute then whisk well to combine, making sure all the chocolate has melted. Allow the ganache to come to room temperature, about 2 hours, or cover and place in the refrigerator overnight (let return to room temperature once removed from fridge). 

      Meanwhile, in a small saucepan, toast the hazelnuts over medium-low heat for 2 to 3 minutes. Watch them closely to see that they don't burn. Set aside to cool, then roughly chop.

      Once the ganache has reached room temperature, transfer it to the bowl of a stand mixer and using the whisk attachment, mix on high speed for 2 to 3 minutes to attain a light and fluffy texture. Evenly spread ganache over the room temperature brownies. Sprinkle with the toasted, chopped hazelnuts and place in the refrigerator to set for 10 minutes. Remove and cut into twelve 3 ¼" by 3" squares and serve. Store brownies in one layer in well-sealed plastic containers.