Wednesday, September 28, 2011

Can it!


I apologize in advance and warn you that this is an extremely nerdy post about canning. Aaron is always bored to death when I go into detail about my discoveries or tales of canning in the kitchen (he tells me I sound like an old lady). While he may find it dull, he certainly has nothing but good things to say about the finished product. I find canning fascinating and fun, and figured there might be a few other kitchen geeks out there who could relate to my nerdiness and benefit from it as well. It will serve as a reference for canning recipes in future posts.


When I first started canning, I found a wealth of information on the subject, but at times, found it to be a bit overwhelming and somewhat contradictory. Sometimes the basic steps or tricks most veteran canners take for granted, leave the new-be’s at a loss, not to mention terrified of botulism. In fact, the risk of botulism was my biggest fear when I first began. What if I poisoned my friends and family!? (For those of you who don't know, botulism is a serious and potentially deadly form of food poisoning due to bacterial growth in food. This is why we can, to kill bacteria and food spores, which allows us to keep food safe to eat for up to a year. For more information on the subject see here). But as long as you're using a reputable recipe and follow proper canning procedures, you have nothing to fear but fear itself! 


What I’ve tried to do here it put into writing each step I go through when canning, keeping in mind the questions or concerns I had when I first began. What I think most people will discover, is that depending on what you're canning, it can be quite simple, very fast, and doesn’t have to dirty a million pots and pans.


Unfortunately, for most of us, the knowledge of canning was lost with our grandparent’s generation. This knowledge would have been passed down to us and never would have seemed scary or intimidating, as it often can be today. My grandparents used to can during World War II, and even built a shack in their backyard for large-scale production. During the war, the home cook was highly encouraged to preserve their own food, for it was not only economical, but spared more food for soldiers overseas. Today, it continues to be economical and while we no longer need to can for necessity, we do it to capture peak of season flavor and for the freedom it gives the home cook to create and preserve their own food. It’s both personal and personalized! Once you get the basic steps down, you can apply them to almost every type of canning recipe.
 

STEP-BY-STEP GUIDE TO CANNING:

What you’ll need (most of it you probably already have):
  • Large stockpot with a tight-fitting lid- large enough to hold however many jars you’ll be canning at one time (so they’re not touching), and to allow at least 1 inch of boiling water to cover the size jars you’ll be using. 
  • Medium sized pot with a lid- to hold your lids and screw bands.
  • Jar rack- available at most hardware and kitchen supply stores. In place of a jar rack you can use a couple of clean dishtowels and place them on the bottom of the pot. However, I find this method to be somewhat difficult. When your water-bath is at a rolling boil, the towels have a tendency to float up to the top. Also, I can’t fit as many jars in my pot with the towels bunched up at the bottom. I use neither of these methods and instead place a circular drying rack on the bottom of my pot. Any of these methods is fine- they simply provide a barrier between the bottom of the pot and the jars, preventing breakage.
  • Jar lifters- allow you to take your jars in and out of your water-bath canner without acquiring third degree burns. 
  • Magnetic lid lifter (or wand)- this allows you to remove your lids from hot water.  Such a handy gadget!
  • Jar funnel- these funnels fit the mouth of all mason jars and make filling them much easier and less messy. 
  • Ladle- for transferring your food to the jars you’ll be canning them in.
  • Tongs- used to remove your sterilized equipment (jar lifters, lid extractor, funnel, and ladle) from boiling water.
  • Plastic knife (the to-go kind) or spatula- used to slide down the inside of your jar, once filled, to extract air bubbles.
  • Jars (mason jars)- come in a variety of sizes and are specially made to withstand the high heat of your water-bath canner.  Choose ones appropriate for what you’re canning- your recipe will tell you this. (I always have an extra jar cleaned and ready just incase you have more of whatever you’re canning than the recipe indicated).
  • A large metal bowl- I like to fill this with hot soapy water to use as a basin to wash my jars, lids, and screw bands.
  • Clean sponge- for washing jars, lids, and screw bands (I reserve one especially for this task).
  • Clean dishtowels for laying on your clean counter. 
  • Paper towels for wiping the rim of your jars before placing on the lid.
Setting up:
Start by wiping down and sanitizing your kitchen counters and placing clean dishtowels on your work surface. Position your drying rack at the bottom of your large stock pot and fill it with enough water to cover whichever size jars you’ll be using by at least 1 inch (I like 2 inches just to be safe). Place the lid on and turn your burner on high. It usually takes 20 to 30 minutes for a pot of water this size to come to a roiling boil. 

In the meantime, fill a large metal bowl with hot soapy water and toss in your jar lids and screw bands. Using a sponge, clean your jars with the soapy water and set aside on your clean dishtowels. Wash your screw bands and lids in the same manner (You can avoid this step if you want to run your jars through the dishwasher. For some reason, I prefer to do it by hand).

Fill your medium sized pot with water, cover, and bring to a boil. Turn the heat off once the water begins to boil. Add your jar lids and rings to the hot water and cover. 

Once your stockpot has come to a rolling boil, add your jar lifters, magnetic lid lifter, jar funnel, and ladle. Boil for 10 minutes to sterilize. After 10 minutes, turn the heat off and using tongs, remove the rest of your sterilized equipment and set aside on clean dishtowels. 

Next, using your jar lifters, add your clean jars to the stockpot and cover. Return to a boil. Continue to boil for 10 minutes to sterilize. After 10 minutes, turn the heat off, but leave the jars in the pot to stay hot until ready to be filled. (Note: you can skip this step only if you’re going to be processing your jars for 10 minutes or more. The canning process will kill any bacteria during that time. But you still need to keep your jars in hot water until ready to use). Now you’re ready to can- be sure to follow recipes closely and process jars for the appropriate time.

Filling your jars and Processing:
Start by removing one jar from your stockpot using the jar lifters. Place on a clean towel and put jar funnel on jar.  Ladle in whatever you’re canning and allow the proper headspace (again, your recipe should tell you how much headspace to allow. Generally it’s ¼ inch for sweet preserves, and ½ inch for just about everything else). Remove funnel, set aside, and using a small spatula or plastic knife, remove any air bubbles- they will float to the top. Wipe the rim of your jar with a paper towel. (This step is very important for it provides a clean rim for your lids to seal). Using the magnetic lid lifter, remove a lid from the hot water and place it on the jar. Screw on the screw band so it’s snug, but not tight (if its too tight, not enough air will escape during canning). Use the jar lifter to place the jar back into the large stockpot of hot water. Continue in the same manner until all of your jars are filled.  Cover your stockpot and return to a roiling boil. Once the water has returned to a rolling boiling, you can set your timer for the processing time provided in whichever recipe you're using (processing times vary depending on jar size, what you’re canning, and altitude). If you're unsure of your altitude, enter your zip code here to find out. For examples describing processing times in accordance with altitude, see here. If you live at or below 1000 ft., simply follow the processing time given in the recipe.

After the processing time is over, turn the heat off and remove the lid (open it away from you so you don’t burn your face) and let the jars sit in the pot for a few minutes to settle before removing them with your jar lifters. Place your processed jars on a towel (not a cold surface, otherwise they could break) and leave undisturbed for 12 to 24 hours. (You’ll probably hear the satisfying pop of the lids sealing as they cool).

Storing your jars:
The next day, or after 12 to 24 hours, check to see that your jars have good seals. Press the center down on each lid to see that it’s inverted. Any that seem faulty should be placed in the refrigerator and eaten within 3 weeks. It’s a good idea to remove the rings from your jars or at least leave them very loose (they are no longer necessary because the sealing compound on the rings is airtight due to the canning process). It’s easier to tell if a jar has “gone bad” if the rings are off, because the lid will pop up.  Sometimes if the rings are too tight it can be more difficult to notice. Label and date your jars and store in a cool dry place (not near a hot stove or any heat source).

Most canned goods need to be consumed within 1 year. Once you open your jars, store in the refrigerator and consume within 3 weeks. There should be no problem with spoilage if you’ve taken the proper precautions, but it’s still a good idea to examine your jars before eating. Bulging lids or any leakage from the jars are cause for worry and should be discarded. Also, don’t eat a canned good that has mold on the surface or emits bad smells. After opening, you can reuse the jars and screw bands, but lids should be discarded after use. You can buy replacement lids at most hardware and kitchen supply stores, or online   

Canning books or sites I love:
The Complete Book of Small-Batch Preserving, by Ellie Top & Margaret Howard
The Ball Complete Book of Home Preserving, by Judy Kingry & Lauren Devine
The River Cottage Preserves Handbook, by Pam Corbin

Sunday, September 25, 2011

A Waffle Affair


For Christmas, Aaron and I received a gift certificate from his parents to Williams of Sonoma and we finally put it to good use a few months ago. We went on a mission to buy new silverware, but were in for a surprise when we saw that one setting was upwards of a hundred or two hundred buckaroos. Yikes! No wonder people get this stuff as wedding gifts! Instead, we both talked ourselves into an All-clad waffle iron. I thought we were being terrible influences on one another, because how often would we really make waffles? But once we unwrapped this baby from its cardboard cocoon, make waffles we did! 


This recipe comes from the Gourmet Cookbook, edited by Ruth Reichl. In it, she writes, “'Brussels waffles,' made on special waffle irons with large, deep grids and topped with strawberries and whipped cream, debuted at that city’s World’s Fair in 1960 and were introduced as Belgian waffles at the 1964 World’s Fair in New York City. In Belgium, the waffles are not relegated to the breakfast table but are considered an afternoon snack. To our mind, however, those deep crevices are ideal receptacles for butter and maple syrup.” I love waffles and desperately wish I could have attended a World’s Fair, so this must be the next best thing!


What I love about this recipe is the tang the buttermilk provides and that the waffles are not sickeningly sweet, in fact they have no sugar at all.  Syrup adds all the sweetness you need. Another wonderful thing about these waffles is that the batter freezes beautifully. If for some reason you have unexpected guests stay the night, you can simply pull the batter out of the freezer to defrost in the refrigerator overnight, and in the morning you’ll have breakfast in minutes.  


I like to serve these waffles with fresh strawberries (when in season) and strawberry butter.  My recipe follows.

BUTTERMILK WAFFLES
Courtesy: Ruth Reichl, The Gourmet Cookbook

Ingredients:
3 cups all-purpose flour
1 tbsp. baking powder
¾ tsp. baking soda
1 tsp. salt
3¼ cup well-shaken buttermilk
1½ sticks  (12 tbsp.)  unsalted butter, melted and cooled
3 large eggs, lightly beaten
Vegetable oil for brushing waffle iron, if necessary (unnecessary if yours is non-stick)

Preheat waffle iron. Put a rack in the middle of the oven along with a baking sheet and preheat to 200 degrees F. 

Whisk together flour, baking powder, baking soda, and salt in a large bowl.  Add buttermilk, butter, and eggs and stir until smooth (batter will be thick). 

Brush waffle iron lightly with vegetable, if necessary, and ladle batter into waffle iron and spread evenly.  Transfer the cooked waffle to the baking sheet in the oven and keep warm, uncovered.  Make more waffles with remaining batter in same manner.  

Yield: Twelve 4-inch Belgian waffles or twenty-four 4-inch standard waffles

STRAWBERRY BUTTER

Ingredients:
½ stick unsalted butter (4 tbsp.), room temperature
1 to 2 tbsp. fresh or frozen strawberries (thawed), puréed
Pinch of sea salt

Start by puréeing the fresh or frozen strawberries in a blender or food processor.  Place the butter in a small bowl and add about 1 to 2 tbsp. of strawberry purée to the butter.  Whisk briskly to combine. Taste the butter as you add the purée, until you reach the desired strawberry flavor. Finally, add the salt to taste and whisk to incorporate. Transfer to a small serving jar, cover, and store in the refrigerator until ready to use. Serve at room temperature.

Yield: about 4 servings

Thursday, September 22, 2011

Sunday lunch


This past weekend at the farmer's market, these gorgeous cherry tomatoes caught my eye! I snatched up a few handfuls to throw in a salad for lunch. Their season is nearly up and I thought it would be a good idea to enjoy these little beauties before they're gone. I made a simple salad of fresh arugula and basil, tossed in my tomatoes, and drizzled it with an aged balsamic and olive oil. To top it off, I garnished my salad with shavings of Vella's Dry Jack cheese (a Sonoma favorite!), accompanied by a glass of white wine.  A lovely lunch for an equally lovely September afternoon.

Tuesday, September 20, 2011

Peach Ambassador


As you might have guessed, I love peaches! I’m not talking about those supermarket wannabes that are hard as a rock and have little to no taste or smell. I’m talking about those precious jewels you can only find at farmer’s markets, or if you’re lucky, off your own tree. Not to sound corny, but when I bite into a perfectly ripe peach, it’s like biting into a little piece of sunshine. Their season is short (July through mid-September) but it’s that peak of season flavor I look forward to all year long. 


When I first moved to New York, I was pleasantly surprised the east coast had peaches as good as the ones I’d grown up with off my grandparent’s tree in California. However, my co-worker and friend, Maria, told me she had never really cared for peaches and couldn’t understand why I was making such a fuss over them. I was astonished at her indifference! In an effort to prove her wrong, I stopped by my local farmer’s market one August afternoon and bought her a couple of perfectly ripe peaches. After sending her off with them on her lunch break, I was more than pleased when she returned overjoyed with her peachy experience. She couldn’t believe how juicy and flavorful they were. The next day, she asked me to buy an enormous bag that she could share with her entire family. I felt as though I had done my peaches proud, and in a way, became their honorary ambassador! 


Last summer, I canned several jars of peaches with the hopes of enjoying that burst of peachy goodness mid-winter. Though they were delicious, the canning process (cooking them in a light syrup and boiling them for 20 minutes in a water-bath canner) robs them of their fresh flavor. And while I love cooked peaches, they taste completely different when fresh. This year I’ve decided to freeze a few bags instead of canning them. The most they’ll cook for is the 45 seconds they’re in boiling water to remove their skins. I like to freeze them in zip-top bags because they’re they make the perfect serving size. On a dreary winter’s day, I can’t wait to defrost a bag of fresh peaches and sneak in a little sunshine!


Tips on buying and storing peaches:

  • There should be no green
  • They should be firm with a little give (not rock hard, but not mushy)
  • Peaches should smell like they taste: sweet!
  • Place in a paper bag if not fully ripened
  • Store in the refrigerator if too ripe to slow down deterioration

FRESH FROZEN PEACHES
Adapted from Alton Brown, foodnetwork.com

Ingredients:
1 teaspoon adult flavorless chewable vitamin C, powdered 
1/4 cup sugar 
1 pound ripe peaches (about 3 to 4 peaches)

Label and date two sandwich-size zip-top bags. Crush the vitamin C tablets in a mortar and pestle to create a powder (if you don’t have a mortar and pestle, place the vitamin C tablets in a zip-top bag, wrap the bag in a kitchen towel, and hit it a few times with a kitchen mallet or hammer). Place ½ teaspoon of vitamin C in each of the bags along with 2 tablespoons of sugar.

Next, slice a large “x” on the bottom of each of your peaches (opposite stem-side) and drop them into a large pot of boiling water for 45 seconds. Remove using a slotted spoon or spider and place them in an ice bath. Once they are cool enough to handle, remove the skins, slice peaches in half, and remove the pits. Cut the peaches into ½-inch thick slices and divide evenly between the two bags. Move the peaches around the bag to thoroughly coat with the sugar and vitamin C mixture.  Let sit for 15 minutes to allow the sugar to dissolve and form a “syrup.” Lay the bags flat and using a straw, suck out any remaining air in the bags. Seal tightly and freeze flat for easy storing. Use within 1 year. 

Serves 2

Notes: 

  • If you prefer a sweeter “syrup,” increase the sugar to 4 tablespoons per bag. Feel free to double or triple this recipe to suit your needs. 

Friday, September 16, 2011

Peace, Love, & Granola


So I have to admit, when I first made granola I felt a little “hippie dippy.” My sex-ed teacher in high school, who was a product of the 60’s, used to use the phrase, “peace, love, and granola baby!” My friend Sarah and I used to get a kick out of her wacky hippie lingo and adopted the phrase ourselves. But maybe there is something to that phrase. After all, what’s more comforting, loving, and peaceful than a bowl full of granola?

 
Unfortunately, in order to get your hands on the good stuff, you usually have to empty your wallet, especially if you eat it as often as I do. So I had to ask myself, is it really worth it? No way! That’s why I decided to make my own, and I’ve never even thought of going back to the store bought stuff since.


I developed this recipe, tinkered with it over time, and have reached what I think is the quintessential granola. I make this about once a week so Aaron and I can have a quick bite before work. It’s simple and delicious and takes very little time to prepare. Make it on Sunday night and you’ll have it the rest of the week, or double it and keep in the fridge.


HOMEMADE GRANOLA

Ingredients:
4 cups old fashioned rolled oats
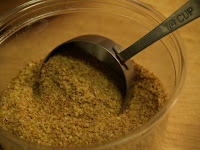
¼ cup toasted wheat germ
2 cups sweetened shredded coconut
2 cups nuts
1½ cups dried fruit (optional)
½ cup vegetable oil
1/3 cup honey
2 tbsp. brown sugar
¾ tsp. sea salt

Preheat oven to 350 degrees.  Add the dry ingredients (excluding the dried fruit) to a large bowl. In a small measuring cup, using a fork, whisk together the honey, sugar, salt and oil. Using a large spatula, toss the honey mixture with the dry ingredients until well coated. 

Pour out mixture onto a 13x18 inch parchment lined baking sheet. Bake for 30 to 35 minutes, tossing the granola every 10 minutes with your spatula, until the mixture turns a nice even golden brown. 

Remove granola from oven and stir in the dried fruit. Let the granola cool completely on the baking sheet before breaking it up and transferring to quart containers.   

Yields: 2½ quarts

The granola keeps well at room temperature for up to 7 days, and 1 month in the refrigerator. 

Notes:
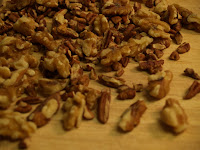
For the nut mixture I use 1 cup slivered almonds, ½ cup chopped walnuts, and ½ cup chopped pecans. Or use whatever you have on hand.

I generally leave out the dried fruit because I like to use the granola as a base and add whatever I feel like from day to day. It’s great with yogurt, fresh fruit, smoothies, trail mix- you name it! 

Wheat germ is the embryo of the wheat seed. I added it to my granola because it has a nutty quality and is a wonderful source of essential nutrients and fiber. You can buy it in the bulk section at Whole Foods or most specialty food stores. It goes rancid easily, so remember to store it in the refrigerator or freezer. If you can’t find it, leave it out.

When mixing together the oil, honey, sugar, and salt, don’t worry if the mixture is lumpy and separates a bit.  When tossed with your oats, nuts and coconut, it will distribute evenly, and the lumps will create delicious clusters of crunchy granola.


If you’re doubling the recipe it will take almost twice as long to bake on two sheet pans.  Halfway through baking, reverse the pans from the top and bottom racks to ensure even baking. 

Tuesday, September 13, 2011

Greetings!

Who am I?
My name is Michael Sullivan and I hail from the rolling, wine-soaked hills of Sonoma, CA. Today, I live with my boyfriend, Aaron, and our floppy-eared cocker spaniel, Lady, in New York City. By day I serve poboys and chicken fried chicken to ravenous lunch-hungry Wall Street workers. By night I leave it all behind and unwind by whipping up something in the kitchen or creating some curiously clever craft. What you’ll find here is a site I’ve made primarily for myself (but I’m glad you’ve stopped by!) This blog is a journal chronicling my cooking and decorating adventures. 


Why a persimmon and a peach?
Growing up, I spent a lot of time at my grandparent’s house, which lucky for me had some amazing fruit trees. My favorite tree was their peach tree, where my grandfather would sit and peel us a peach or two to share on summer afternoons. They also had an enormous persimmon tree, which my grandmother still uses to make my favorite holiday cookies.


What I cook:
The food I like to cook is the food I like to eat. It is unpretentious seasonal food that is made from scratch, both comforting and homey. I’m primarily a self-taught cook and developed a curiosity for food in college. It was then that I realized I liked cooking more than my average classmates, when I was making risotto and cakes, and they were microwaving ramen.

At home, I try to be diligent about typing-up, revising, and filing recipes that worked or that I love, so I guess this blog is an extension of just that. Consider yourself a voyeur into the “Recipes to Print” file on my computer. After all, if food is to be shared, then so are its recipes!

What I make:
I have an affinity for vintage or home-inspired holiday and party décor. This includes Birthdays, Halloween, Christmas, St. Patrick’s Day etc. etc. You get the gist. I love to make decorations that are entirely my own.  Creating your own décor for a particular holiday not only gets you in the seasonal spirit, but can be a lot of fun too! Let’s face it, I’m an old lady trapped in a young man’s body.

Thanks for reading!

Michael